How to Host Your Publii site Using Netlify(Free)

Navigating the hosting journey for your Publii website may seem challenging, but fear not! In this post, I'll guide you through the process effortlessly, unveiling the free method of hosting your websites on Netlify.
Let's embark on this step-by-step adventure together!

Also read:
Table of Contents
Creating Your Website On Publii
Begin your website creation journey with these two simple steps:
Step 1: Craft an empty website template folder on your PC, giving it a name of your choice. This folder will serve as the foundation for your website.


Step 2: Using Visual Studio Code. Import the folder you created into VScode and effortlessly generate an HTML file within it. Click the create file icon, ensuring it carries the .html extension. Now, add the fundamental HTML codes by pressing Shift + 1, followed by Enter. Voila! Your website file is ready to take shape.

Step 3: First, either establish a new Netlify account or log in if you already have one. Once in, choose between a paid or free account and hit the "Create" or "Add New Site" button. This will seamlessly deploy your website folder from your PC to Netlify, allowing you to craft a distinctive subdomain URL link for your website. You have now created your blank website effortlessly!

Creating a Server On Publii Using Netlify
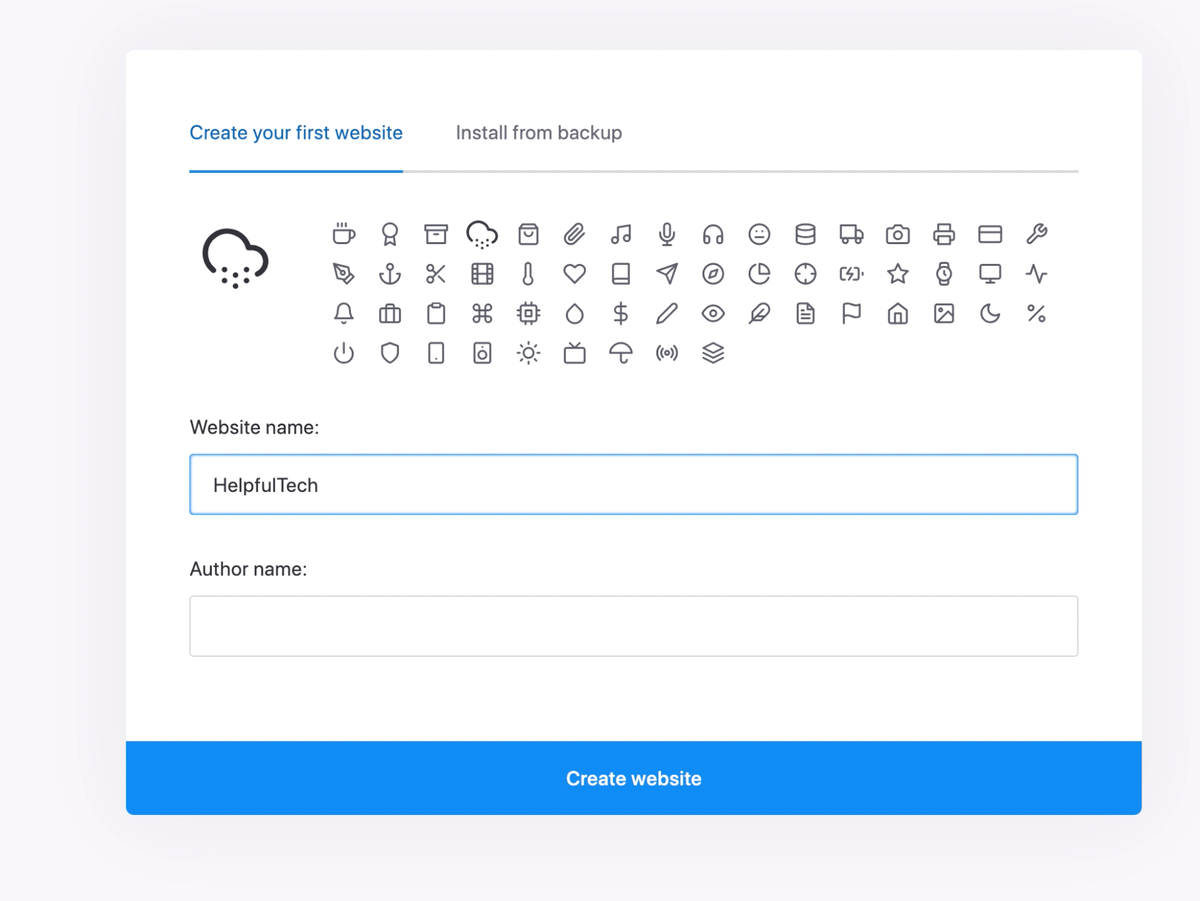
Step 1. Launch Publii: Open Publii on your desktop, and the first screen you'll see is the "Create New Website" page.

Step 2. Select an Icon: Select an icon for your site. This icon is for Publii's backend, helping you distinguish it from other sites you might create later. Click on any icon of your choice and color of your choice, and a preview will appear on the left.
Step 3. Name Your Website: In the "Website Name" field, enter the name you want for your site. This name will show up in the Publii backend, on your live site as the logo (if set to text), and as the tab title in the browser.
Step 4. Specify Author Name: Enter your name or the designated author's name for posts in the "Author Name" field. This will be used on all posts, and you can add more authors later via Publii's Authors section.
Step 5. Create Your Website: Click the "Create Website" button. Now, you can start adding posts and tags, but it's advisable to first choose a theme and configure server settings for your site. Refer to the "Installing Theme" and "Server Configuration" sections for details.
Step 6. Initial Server Configuration:
- If it's your first time setting up a server in Publii, click "Configure Server" as the "Sync your website" button won't be available.
- Alternatively, access the Server Configuration screen by clicking on the "Server" option in the left sidebar.

Step 7: Streamline your server selection process by opting for Netlify. Begin by clicking on Netlify and inputting your Netlify URL from the previously generated blank website.

Navigate to the Site Information section to unveil the Site ID by visiting Site Overview and then Site Configuration.

then copy then paste the site ID.

To seamlessly integrate your Netlify subdomain, create a Netlify token. Head to your Profile, click on Applications, and scroll down to the Personal Access Token section.

Generate a new access token by clicking the "New access token" button. Provide a description, set the expiration to "No Expiration," and generate the token.


Copy and paste this token into the Netlify token section within Publii config. Don't forget to save your settings.

This meticulous process ensures a smooth connection between Publii and Netlify, enhancing the functionality of your website.
Host Server Configurations
To seamlessly integrate your domain name with Netlify, a crucial step involves establishing a connection between your domain name provider and Netlify.
Ensure a harmonious connection by adding your custom domain, purchased from your domain provider, to Netlify. Navigate to the Menu button, click on Domain Management, and input your custom domain URL.


Click on Go to DNS panel to copy nameserver

Copy then paste the Nameserver in your Domain name providers.
Go to your domain name provider and change the Nameservers to that of Netlify.


Complete the process by clicking the Verify button. This essential step ensures the smooth operation of your domain in conjunction with Netlify.
Effortlessly synchronize your domain by copying and pasting the DNS records you generated into your domain provider's DNS records.
Patiently await the synchronization process for seamless integration. This straightforward step ensures a harmonious connection between your domain provider and the DNS settings, paving the way for your online presence to flourish.
Activate SSL From Netlify
Once you've configured and submitted your DNS settings to your domain name provider, revisit the Netlify dashboard. Click on your profile, navigate to Domain Management, and scroll down to the SSL/TLS certificate section.
Initiate the verification process by clicking on "Verify DNS Configuration" and patiently await activation. This step ensures the secure activation of SSL/TLS certificates, fortifying the protection of your website.
Stay tuned for the green light, indicating that your DNS configuration is successfully verified and activated.
Setup Your Publii Theme
Kickstart your website customization journey with Step 1: Select and download your preferred theme from the Publii marketplace. Explore the diverse range of themes available, each crafted to enhance the visual appeal and functionality of your website. This initial step sets the stage for creating a unique and captivating online presence.

click Download to download any theme of your choice.
Continue your website customization journey with Step 2: Within Publii, access the theme options by clicking on the three-dot icon at the top left corner of the screen. Choose "Theme" and proceed to "Install Theme."


This action enables you to effortlessly upload and apply the theme you recently downloaded from the Publii Marketplace.
Enhance the visual aesthetics and functionality of your site with just a few clicks.
In the next phase of your website customization journey, proceed to Step 3: Once your chosen theme is successfully installed, navigate back by clicking "Go back." Within the Basic Settings section, access "Site Settings."

Click on "Select Theme" and choose the recently installed theme from the previous step.

Seal the deal by clicking "Save Settings." This straightforward process ensures that your website dons the desired theme, reflecting your unique style and enhancing user experience.
Also read;
Brave Browser Usage Statistics
Hope you find this post helpful, share with others to help them out, thanks!